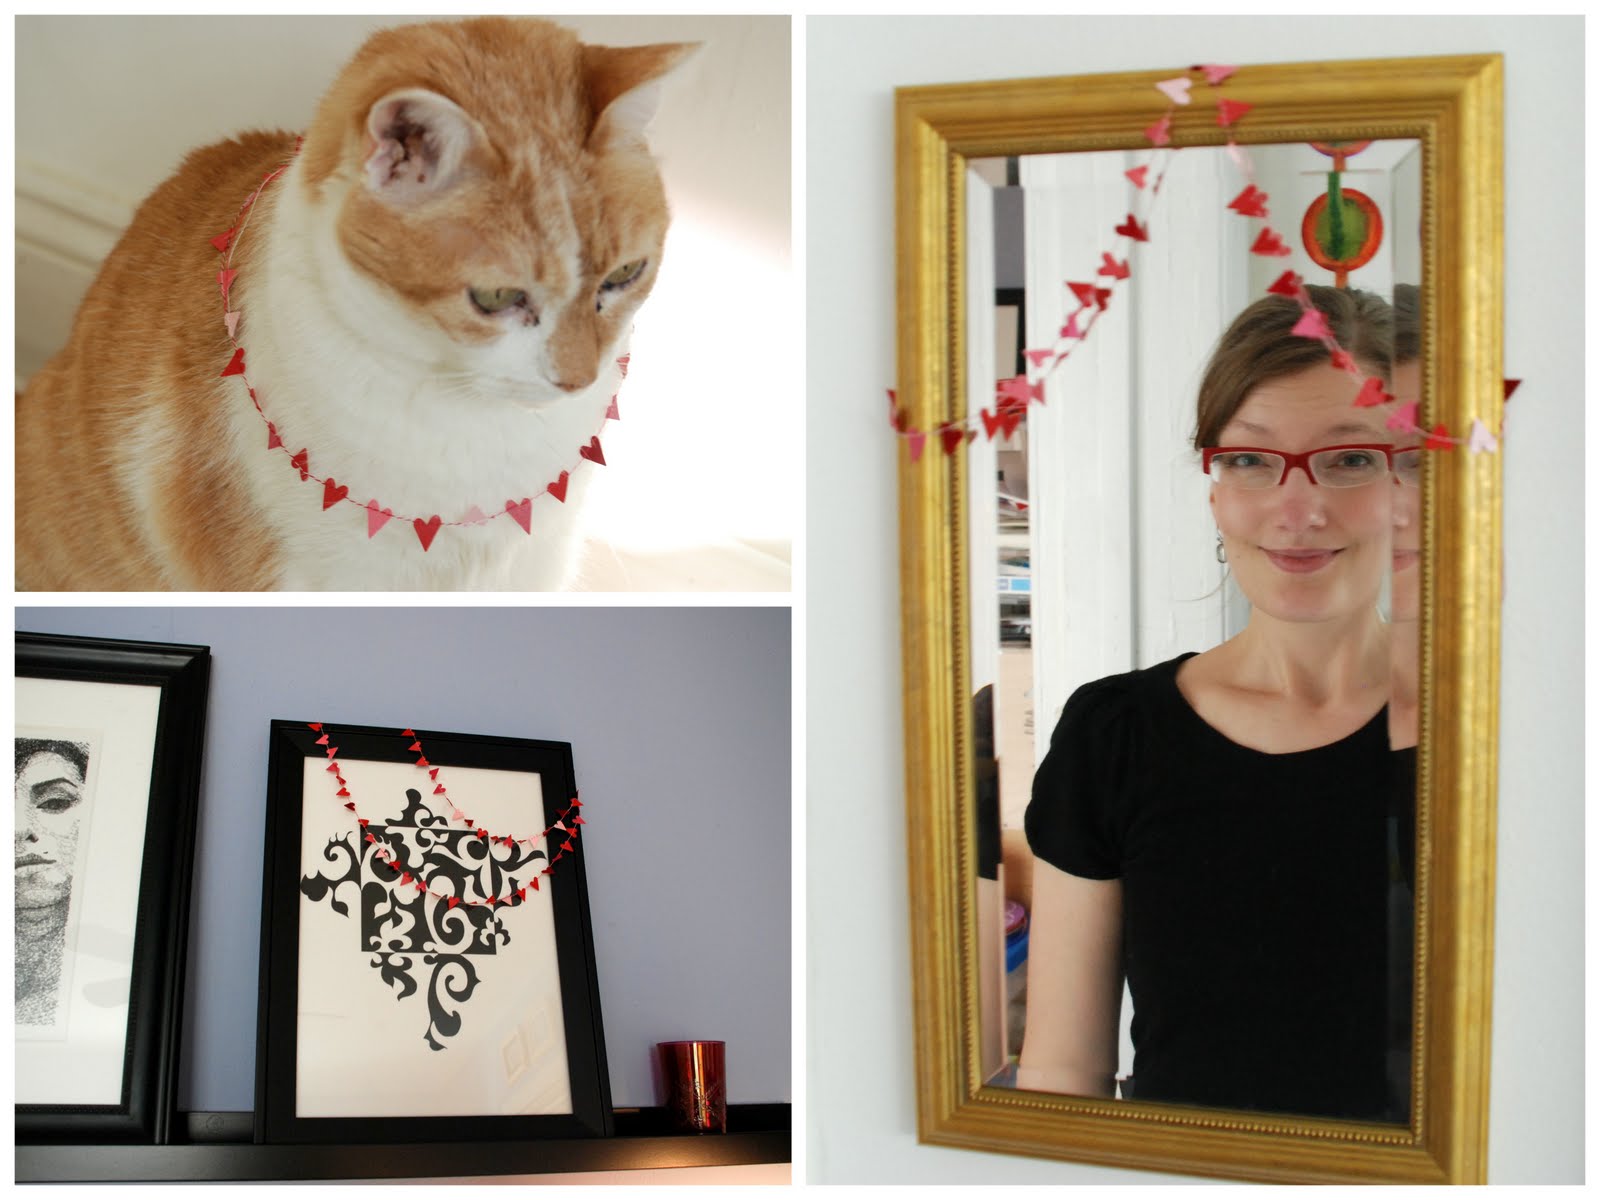
I was in such a festive and productive mood coming up on Valentine's Day this year that I ended up crafting several dozen feet of heart garlands. Which is great, because with certain things, more is more. Garlands for example. There's got to be several feet of it, or you can't call it a garland. And if you can double-strand them, all the better.
I made these with two different size hearts. The larger hearts are about 1" and I like them a lot, but the miniature heart garlands are so darling I could eat them. Those little hearts are barely 1/2", and there's just something irresistible about seeing so many tiny tokens of love strung side by side and ready to decorate just about anything.
I put together a little tutorial below on a nifty way to churn these out. You'll need a sewing machine, but trust me — it's as easy as it gets. You could make them using different shapes, and in different color schemes. These would be so great as decoration for a party or a playful wedding! They also do a fine job adorning frames and felines.
Okay, let's have at it:
Tutorial: Super simple sewn paper garlands
You can make these from paper scraps, cardstock, photographs, gift wrap, junk mail... if you're anything like me, the question isn't
what to use, but what
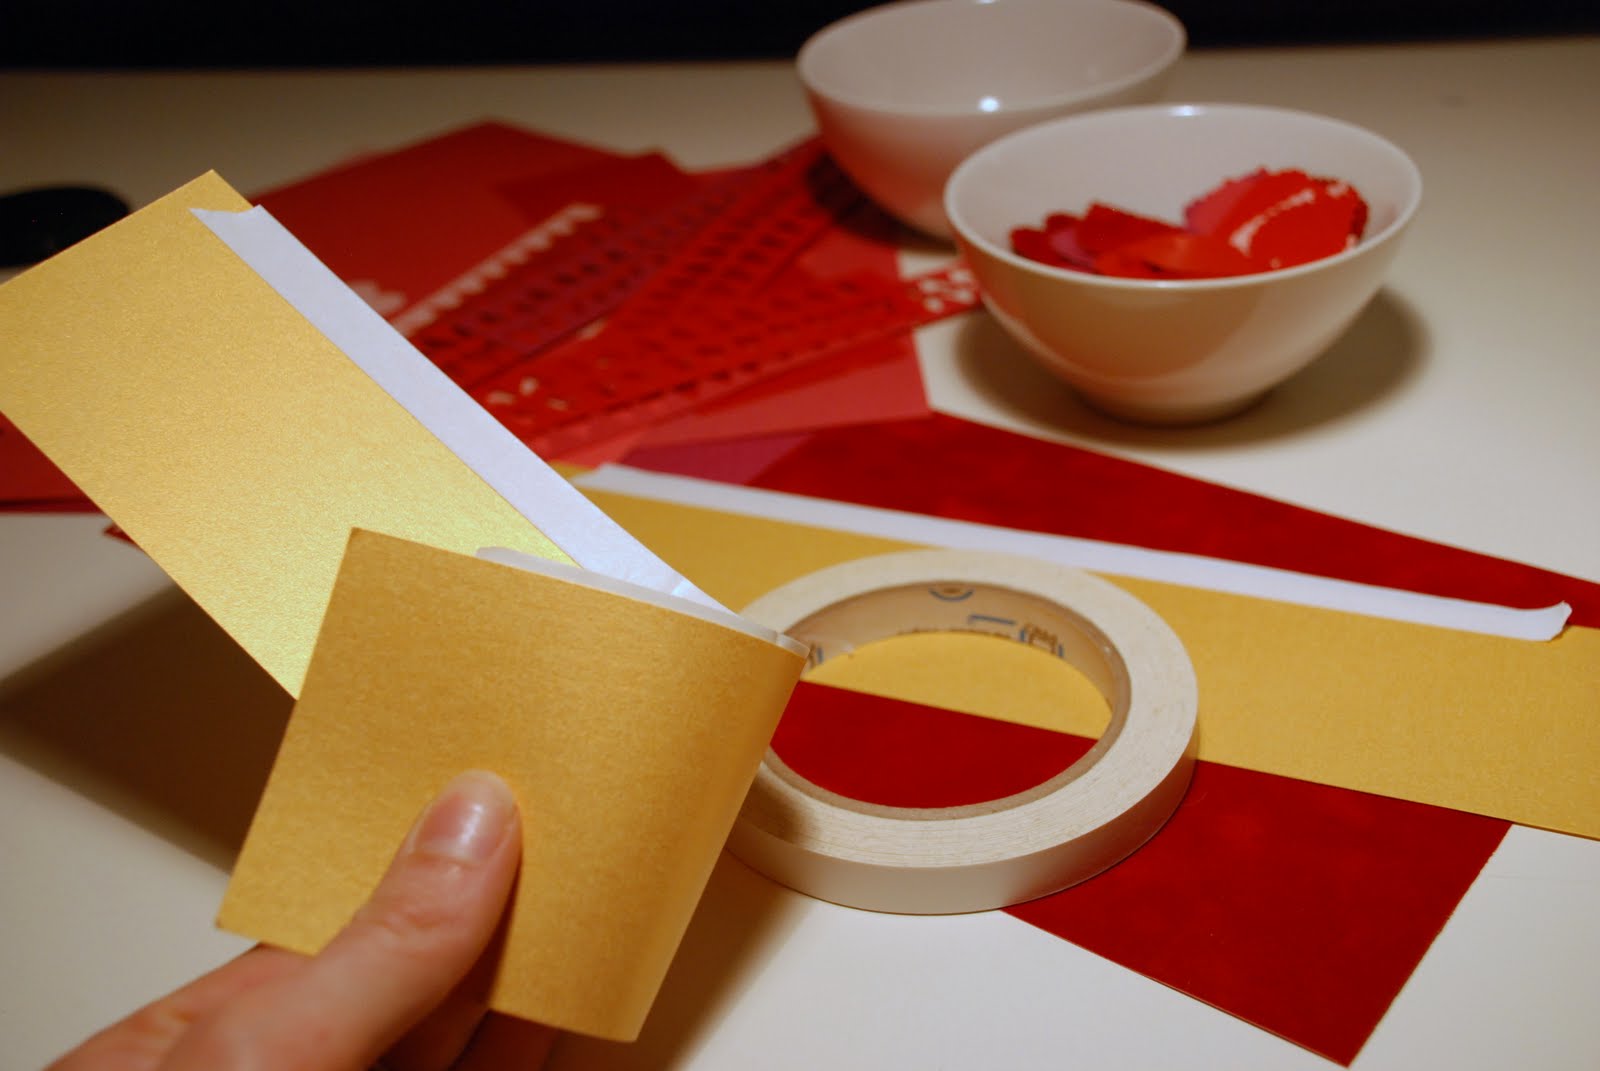
not to. This really is a great project for all those bits of pretty paper scraps that were left over from other projects years ago. (In that alone it is an immensely gratifying project, as it rewards hoarding mentality!) Just don't use anything too delicate, or it will shred in the sewing machine. When in doubt, run a small piece of it through the machine just like fabric and see if it holds up to the stitches.
1. Use a craft punch to cut out as many hearts (or other shapes) as you fancy.
2. Find yourself a strip of cardstock of a decent length, and tape a piece of
low-tack(!) tape (e.g., artist's tape) along its long side, so that the tape extends just a little bit over the cardstock.
3. Stick the hearts to the tape, leaving as much space in between them as you like. Give them a gentle push against the tape so that they stick, but keep in mind that you want to be able to pull them off again later. Make sure that the hearts extend over the tape by about the same amount, roughly 1/3 or 1/2 of their height.
4. Get your sewing machine ready to go. Use the thinnest needle and the prettiest thread you have.
5. Put a second strip of cardstock on top of the hearts so that they're sandwiched in between. The point here is to cover the sticky side of the tape, so that it doesn't cause trouble in your sewing machine. Only the top of the hearts is supposed to poke out.
6. Using a short straight stitch, sew right through the top of the hearts, feeding the cardboard strip through your machine at a nice and even pace. When you've reached the end of the strip, grab the next one and feed it in right after the first one, thereby connecting several strips to one long, growing garland.
7. This is what it should look like. Don't worry if your stitches aren't even, it really doesn't matter.
8. When you're reached the desired length, or run out of hearts, stop sewing. Cut the thread, leaving a bit of extra thread at the end for hanging. Carefully remove the hearts from the tape.
9. Wind the garland around a piece of cardboard to keep it from tangling. Happy decorating!